Thursday, December 29, 2011

Orange Lilies in a White Pitcher

I am so proud of my watercolor students. They are
doing so good! I really felt like they were ready for 
this piece. We didn't just jump straight into the piece.
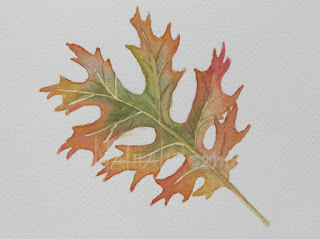
We painted leaves,
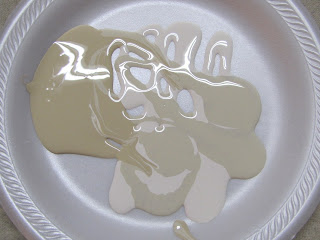
and we painted the white pitcher.
I love the simplicity of this pitcher.
The orange lilies were from my niece's wedding,
the leaves were from the oak tree in our 
front yard, and the doily is from my 
stash of vintage crochet.

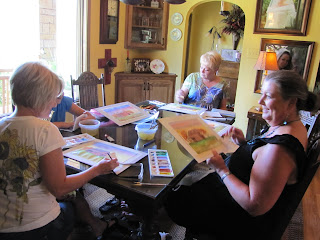
We took our time and painted for several
weeks.
My favorite teaching quote:
Tell me, I will probably forget.
Show me, I might remember.
Involve me and I will never forget.

And we have learned - 
practice, practice, practice
paint, paint, paint!
Above all, we have fun 
and enjoy each other!

P.S. If you can't attend my classes or workshops, 
visit My Etsy shop and look at my instructional dvd's.
post signature

Tuesday, November 29, 2011

A Long Way From Home

My good friend, Renee has moved a long, long way
from home (home being West Texas).
She is settling into her home (temporary) in North Dakota.
Let me say again-a LONG way from home.

One of the first things she did in her new "land" was
to seek out a place to worship, 
which can be like trying to find a new family
.
Along the way she took a few pictures 
of some great, perfectly aged churches. 
When I saw her photos on her blog I
asked if I could paint this great window.

The window nor the building is the important thing.
The important thing is worship and the freedom
to gather with others to worship.

But the hour cometh, and now is, 
when the true worshippers shall worship the Father in spirit 
and in truth: for the Father seeketh such to worship him.
God is a Spirit: and they that worship 
him must worship him in spirit and in truth. 
John 4:23-24

Thanks, Renee!

Wednesday, November 2, 2011

W.I.P. Copper, Grapes and a Pear Watercolor

 
I wanted to share this little Work In Progress video. 
I absolutely love painting metal! And grapes! And pears! 
Well, you get the idea. I love to paint. 
I haven't painted much in the last week or two. 
There has been a lot of road time; shows, workshops,
conferences, doctors' appointments, etc.
And I have been "fall" cleaning. The cooler weather has
been a welcomed change to the hot and dry summer.
Change is in the air. I have a feeling that our
winter will be as extreme as our summer,except
where the summer was hot and dry this winter
will be cold and wet. We could use the "wet".
Here is the finished work.
Psalm 46:10 Be still and know that I am God!!!


post signature

Friday, October 14, 2011

How To Create a Faux Stone Look Trompe L'Oeil Part 2

Well, it has definitely been more than a few days. Time sure
goes by faster these days. You know, life is like a roll of
toilet paper! The closer it gets to the end the faster it goes.
Anyway, let's finish this canvas. Let me share with you
this trompe l'oeil (to fool the eye) technique.
Measure in about 2" and applied painters tape. Leave 
1/2" and apply another row of tape. In the upper right
corner you will see a little piece of tape at a 45% angle.
Top and left side is deep gray. Note the miter corner.
Right side and part of the bottom is white or pale
gray. This would indicate the the light source is
on the left.
The white or light gray will touch the edge of the scroll
design. I transferred the design onto the canvas using
graphite paper (not shown).
 I photographed this great piece of scroll work on
an old building in Mineral Wells. You can see the 
light is on the left side of the raised areas.
Side load your brush with light gray. Apply to light areas.
Again using a side loaded brush, use dark gray to add
shadows. Go easy!!! You can always add more but
it can be frustrating to try to lift color that is too dark.
Also, This is IMPORTANT. The paint needs to be thin
and a bit transparent so the texture of the base will show
through. Now you can add text or just about
anything you want to.
Hope you enjoy this project!

post signature

Tuesday, September 13, 2011

How To Create a Faux Stone Look

 It has been a while since I have posted a decorative how-to
project for you. I recently painted the above faux stone effect on canvas.
Then I added a quote in a fancy lettering style. Anyway, I thought you
might enjoy this step by step instruction.
 Start with 3 similar paints. These are latex wall paint but you could use
acrylic craft paint. You will need a small liner brush or 
a feather (goose or chicken), a spray bottle with water, and
you will need a sponge. A sea sponge is good.
The one I used was an inexpensive wanna-be from WalMart.
 Puddle/swirl the 3 different colors of paint. I like them 
mingled on the plate and then mingled on the canvas.
This technique can be used on the wall, a board, a countertop,
a  floor, just about anywhere.
 Spray the surface with water. This will help mingle the paint
and slow the drying time so you don't feel pressured.
 Dip the sponge in the paint catching some of all the colors.
 Dab, dab, dab onto the surface. Be sure to change directions 
with your sponge so you get a random pattern not a repeated pattern.
 To get a good stone effect don't just dab, occasionally press 
the sponge into the surface so that
more paint is released and the edges are softened.
Before the paint starts to dry, spritz a little water here and there.
This will cause the paint colors to flow together. Don't over spray!
And this part only works if your surface is laying flat.
To create the veins use the edge of a feather or a small
liner brush. Using the feather, drag thru a couple of the colors
then pull across the surface. Using the small brush, touch 
into a couple of colors (not mixed) 
then roll and pull (at the same time) across the surface.
The effect is nice if the paint is still a bit damp on your surface.
Also a little spritz of water here and there can soften the
vein and make it appear to go into the stone.

I hope you will get a chance to use this technique and I would
love to see your project. 

I will be back in a day or two to show you how to 
make the stone look like it has been carved.


post signature

Sunday, September 11, 2011

Freedom-Don't Take It For Granted Watercolor

I am so excited!!! I just won my first award!
This won 3rd place at the Watercolor Horizons
show at the Ellen Noel Museum in Odessa. 
The inspiration for the painting:
Joe and I were at a job related training and the instructor
opened the session with a short documentary about
Frances Scott Key and "The Star Spangled Banner".
I was moved to the very core of my being at the 
sacrifices made by our founding fathers.
"O, say does that star spangled banner yet wave?
O'er the land of the free and the home of the brave."
or BECAUSE of the brave.
The flag is displayed on the porch
with the rocking chairs.
Comforting and comfortable.
FREEDOM-Don't Take It For Granted!

post signature

Wednesday, August 31, 2011

Memories - Acrylic on Canvas

A potential client called Tuesday. 
She wanted a painting of a horse 
for a staff member that was moving?
(Her) Can you paint a horse?
(Me) Yes! What's your budget? 
Acrylic or watercolor?
Canvas or Paper? What size?
What color horse? The head only or
standing, running, rearing up, bucking,..?
You want it when?
Thursday? Sure!
(Her) Can you add a windmill and water tank?
(Me) Sure!
"Memories" 11"x14" Acrylic on gallery wrapped canvas
SOLD!
post signature

Thursday, August 25, 2011

Fishers of Men Commission

It has been a busy week! Thank you, Lord!
I have finished several commissions. Our good friend, Mike
asked me to paint one for his office. He wanted a stormy
sky, a stormy sea, a huge rock with a man hanging on to
it reaching out to someone in the waves and a sinking
boat in the background. Hmm!?! 

What should I use as a reference. We are in a drought. 
Our lake is at 2 percent-not 2percent low. 
That would be 98 percent low. 
So, no waves! Storm clouds have been scarce as 
hen's teeth. With the moral decline we have seen
a lot of shipwrecked lives. 
The waves behind the figure in the water
are dark and pulling. The wave in front of the figure
is light and figure on the the rock is holding 
on tightly with a strong right arm.

The precious thing about this painting is 
the model for the figure on the rock is Joe 
and the one in the water is our son, Stephen.

Jesus is our Rock! He is our Redeemer! He draws
us up from the deep! We ought also to reach out
to those who are overwhelmed and drowning in waves
of fear, depression, poverty, illness...
Make us Fishers of Men and Women!!!


Saturday, August 20, 2011

3 Chilies in Watercolor Class

When I was in the produce section at the grocery store
I spotted these Anaheim Chilies. I picked these 3 that were
changing colors and I knew they would be fun to paint.

It was so fun that I taught in this weeks class
I am so loving teaching my watercolor classes.  I love
seeing their work, how they are progressing, 
and the friendships that are growing
Last week we had a special treat. 
We met at Laurie's house. She is such a gracious hostess.
She has a beautiful home and we enjoyed a yummy brunch
and then splashed around in the paint while 
Zach splashed around in her pool.


post signature

Tuesday, June 28, 2011

Squash Blossom Neacklace Watercolor

Watercolor on paper 8 X 10
My watercolor class students requested or suggested
that they would like to paint a squash blossom
necklace. One of the students had this lovely piece
I took a bunch of photos with an assortment
of backgrounds. This one was photographed on a 
turquoise painted table. I think I really like it on white.
Tomorrow I will make sure I get a good image of it.
With All My Art - Nathalie

Sunday, June 26, 2011

Watercolor Class Geraniums

Here is the class finished pieces.
They did a good job, don't you think so?  
I am so proud of them. I have enjoyed teaching 
color blending, washes, which brushes, why wet in wet, etc.
But, my favorite part has been getting to know the
ladies that had been taking the classes.
Chatting over palettes of freshly mixed paints and a new piece
of paper is just as good as sharing over a cup of coffee.
We might have to paint this sometime.
Thanks for stopping by!

post signature

Thursday, June 23, 2011

Teaching a Watercolor Class

"Geraniums and Clay Pots" 
This will be the watercolor class lesson today.
I started teaching a watercolor class in February of this year. 
It has been an amazing time. 
Them: Why do you mix those colors? 
Why does her green look different than my green? 
How did you do that? Oh my! I have a bloom! 
Now, what do I do? My painting doesn't look like your painting? 
 
Me: (Not the answers to the above questions) 
Wow! That turned out nice! I really like that effect!
Let's see if we can fix that. Hmm!?! 
What if you add a ...? Wait! Don't get ahead of me. 
You need more water. You need more pigment...
You know who has learned the most by teaching the class?
ME!!!

One of my favorite teaching quotes:
"Tell me and I will probably forget.
Show me and I might remember.
Involve me and I will never forget.."
That is the method that I try to use in my classes.
Check be later and I will show you what we did in class today.

Friday, June 17, 2011

More New Technique - Loose, Detailed Watercan


I really enjoyed the bright, colorful technique I
used on the San Miguel Mission watercolor.
So, here we go again.
I reserved my white areas with masking fluid.
Then, I brushed the entire surface with clear water.
I dropped in colors. The colors look randomly placed
but they are not. Burnt sienna was placed in the
flower pot area. Purple and turquoise in
the shadow and watercan vicinity.
I splattered in sap green, olive green, cad yellow,
and cad red. While the greens and reds were still wet,
I dropped in purple in the areas that will be
in shadow and a bit of burnt sienna just because.
After the painting was dry I began to add some
loose detail. This was the s-t-r-e-t-c-h for me,
since I love details
Hmm! If it's detailed,  how can it be loose and
if it's loose, how can it be detailed?
"Some Water, Some Plant..."
8x10 on Arches Paper
"So neither the one who plants, nor the one
who waters is anything, but only God,
who makes things grow."
1 Corinthians 3:7

Friday, June 3, 2011

San Miguel Mission - Trying Something New

The San Miguel Mission in Santa Fe
is the oldest mission in the United States.
Joe and I visited Santa Fe several years ago and I
found many wonderful sights to photograph.
The mission was one of those.
Well, this afternoon I decided to try a technique that
I have never used before. I started with just loose color 
mingling. Then, some details. I really enjoy the challenge 
of watercolors and realism so this semi loose
style is a stretch for me.
However, I do like the brighter colors.
Might have to try this again sometime.
 I painted the one on the left in '09and it is my watercolor
class project for thenext two weeks.
Just wanted to try some watercolor drama.
Let me know which one you like best.
Thanks for stopping by!

Tuesday, May 31, 2011

Texture Tuesday - Grandma's Berries


It's Time for Texture Tuesday. The theme this week
is gardening. These are Grandma's Berries. Actually, I think
they are Papa's. But she and I were in the berry patch to take
this photo. I have cropped it, used a guassian blur, added
Kim's Bentpages edges. If you love playing with your camera
and your photoshop, pop on over to Kim Klassen's Cafe.
Related Posts Plugin for WordPress, Blogger...